Building MPI Clusters on Chameleon: A Practical Guide
Simplifying Distributed Computing Setup with Jupyter, Ansible, and Python
- Nov. 18, 2024 by
- Michael Sherman

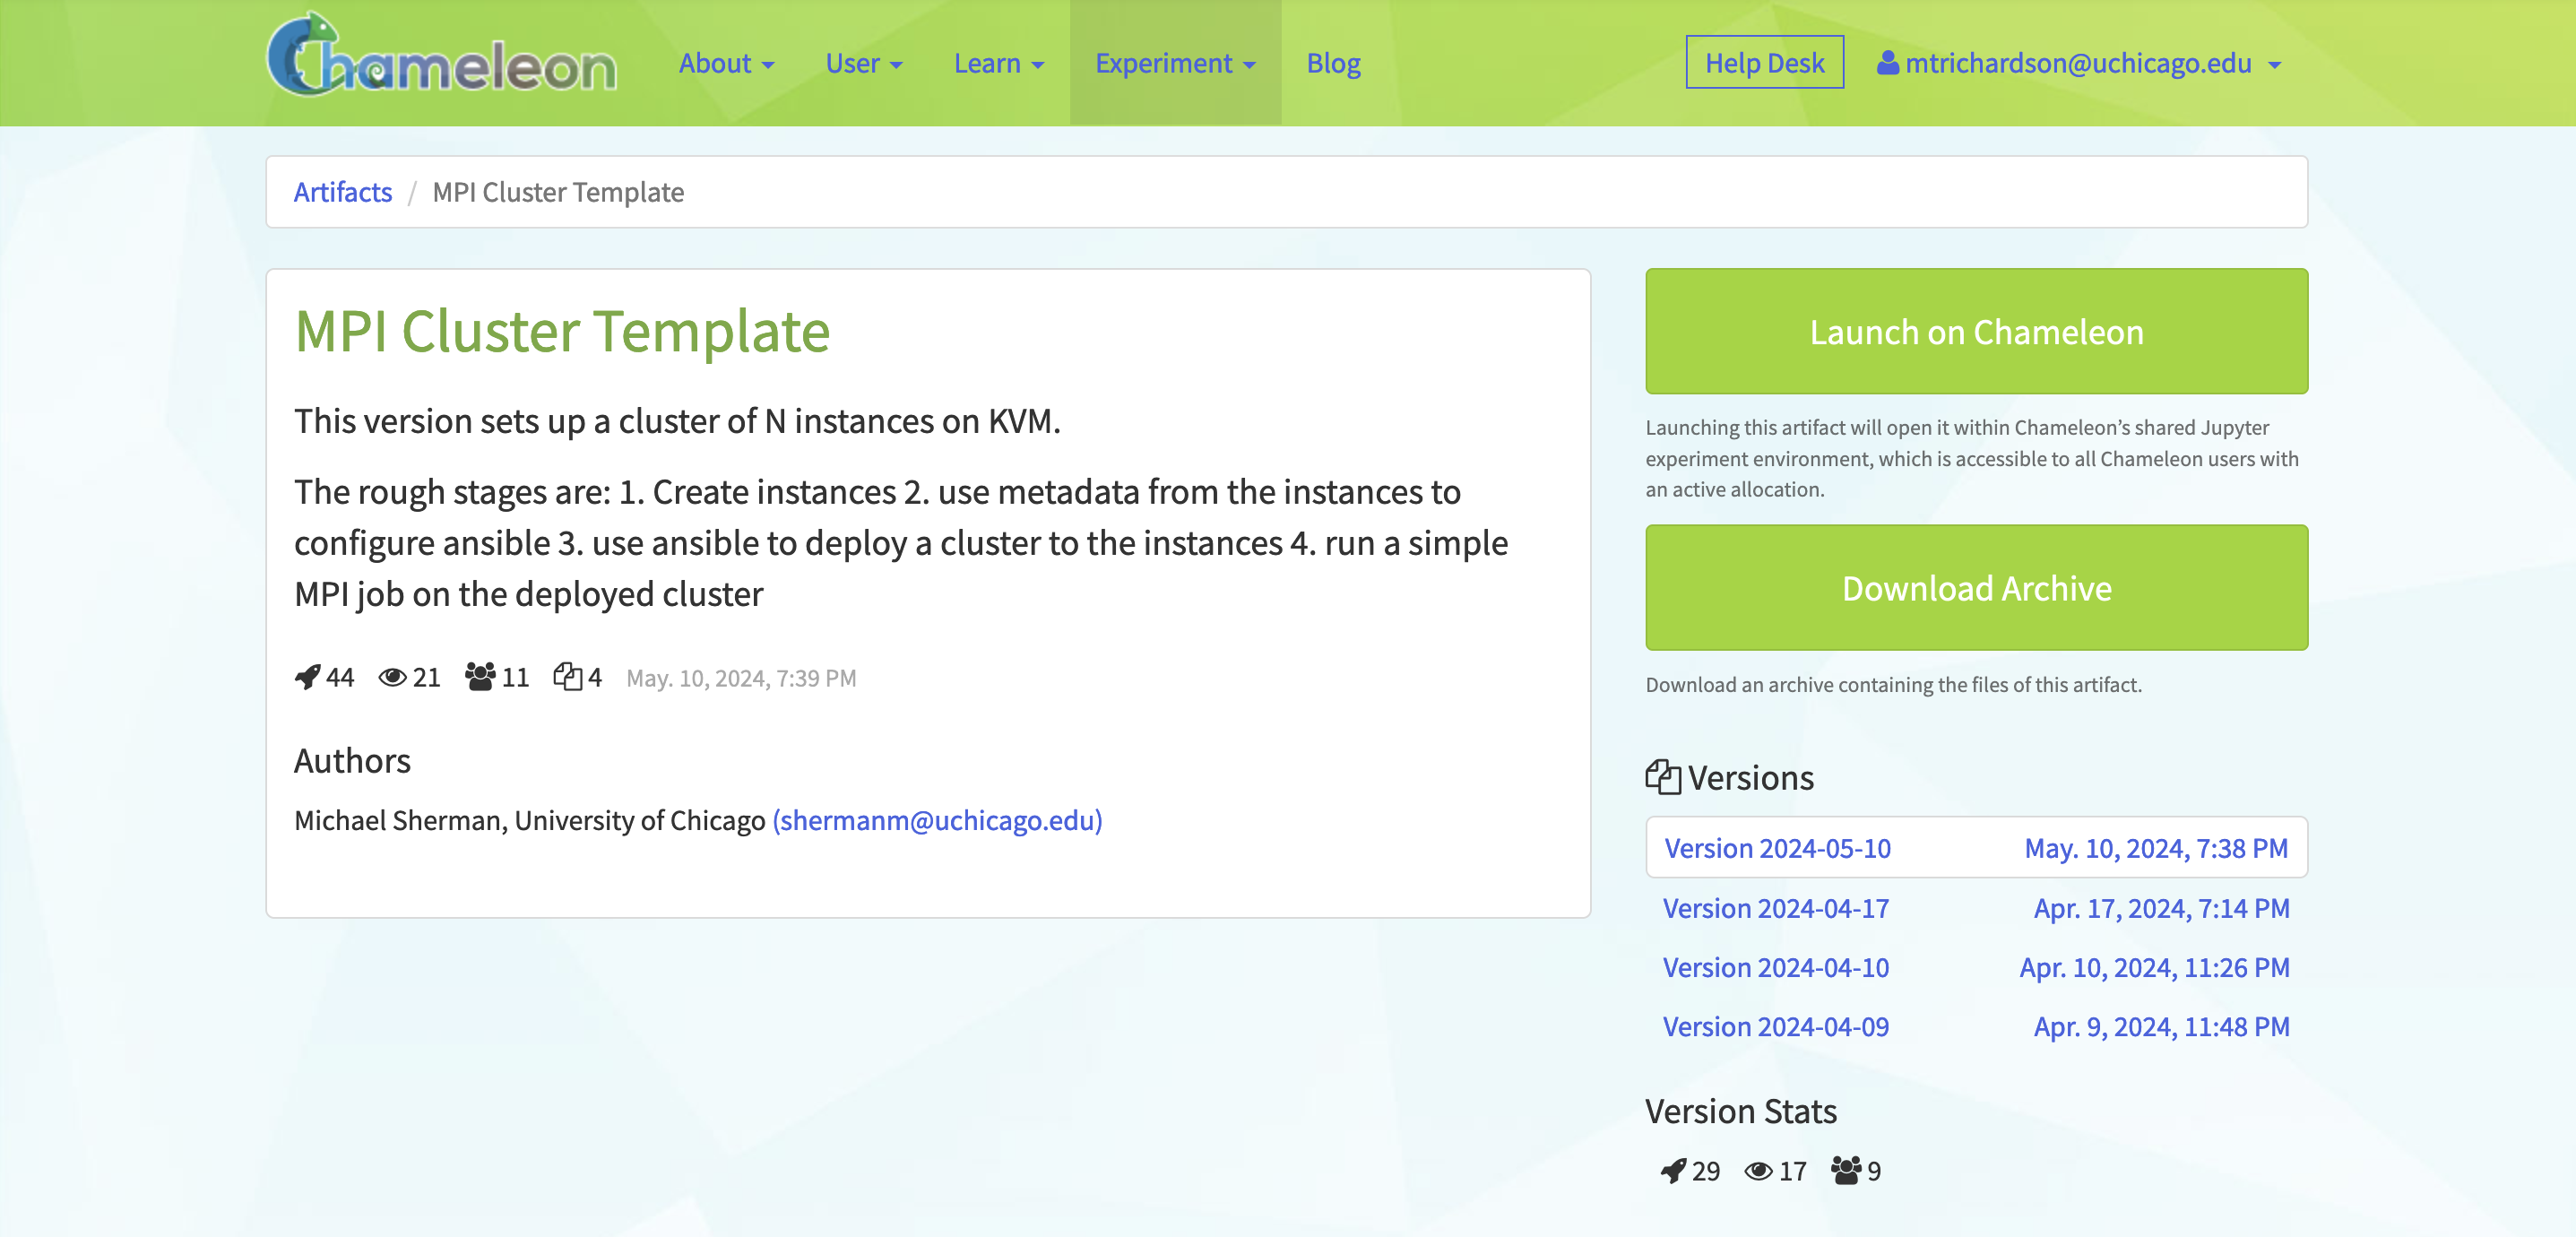
Running distributed applications across multiple nodes is a common need in scientific computing, but setting up MPI clusters can be challenging, especially in cloud environments. In this post, we'll explore a template for creating MPI clusters on Chameleon that handles the key configuration steps automatically, letting you focus on your research rather than infrastructure setup.
Why Use This Pattern?
When researchers need to run parallel applications, they often face several hurdles:
First, there's the challenge of configuring network connectivity between nodes and ensuring proper security settings. Then comes the task of setting up SSH access and installing MPI consistently across all nodes. Finally, researchers need to manage multiple nodes effectively while maintaining their synchronization. Our template addresses these challenges using a combination of Jupyter notebooks, Ansible automation, and Chameleon's Python SDK (python-chi) to create a repeatable process.

The Building Blocks
The template consists of three main components that work together to create a fully functional MPI cluster:
1. A simple MPI "Hello World" application that demonstrates basic cluster functionality by having each node report its hostname and rank within the cluster.
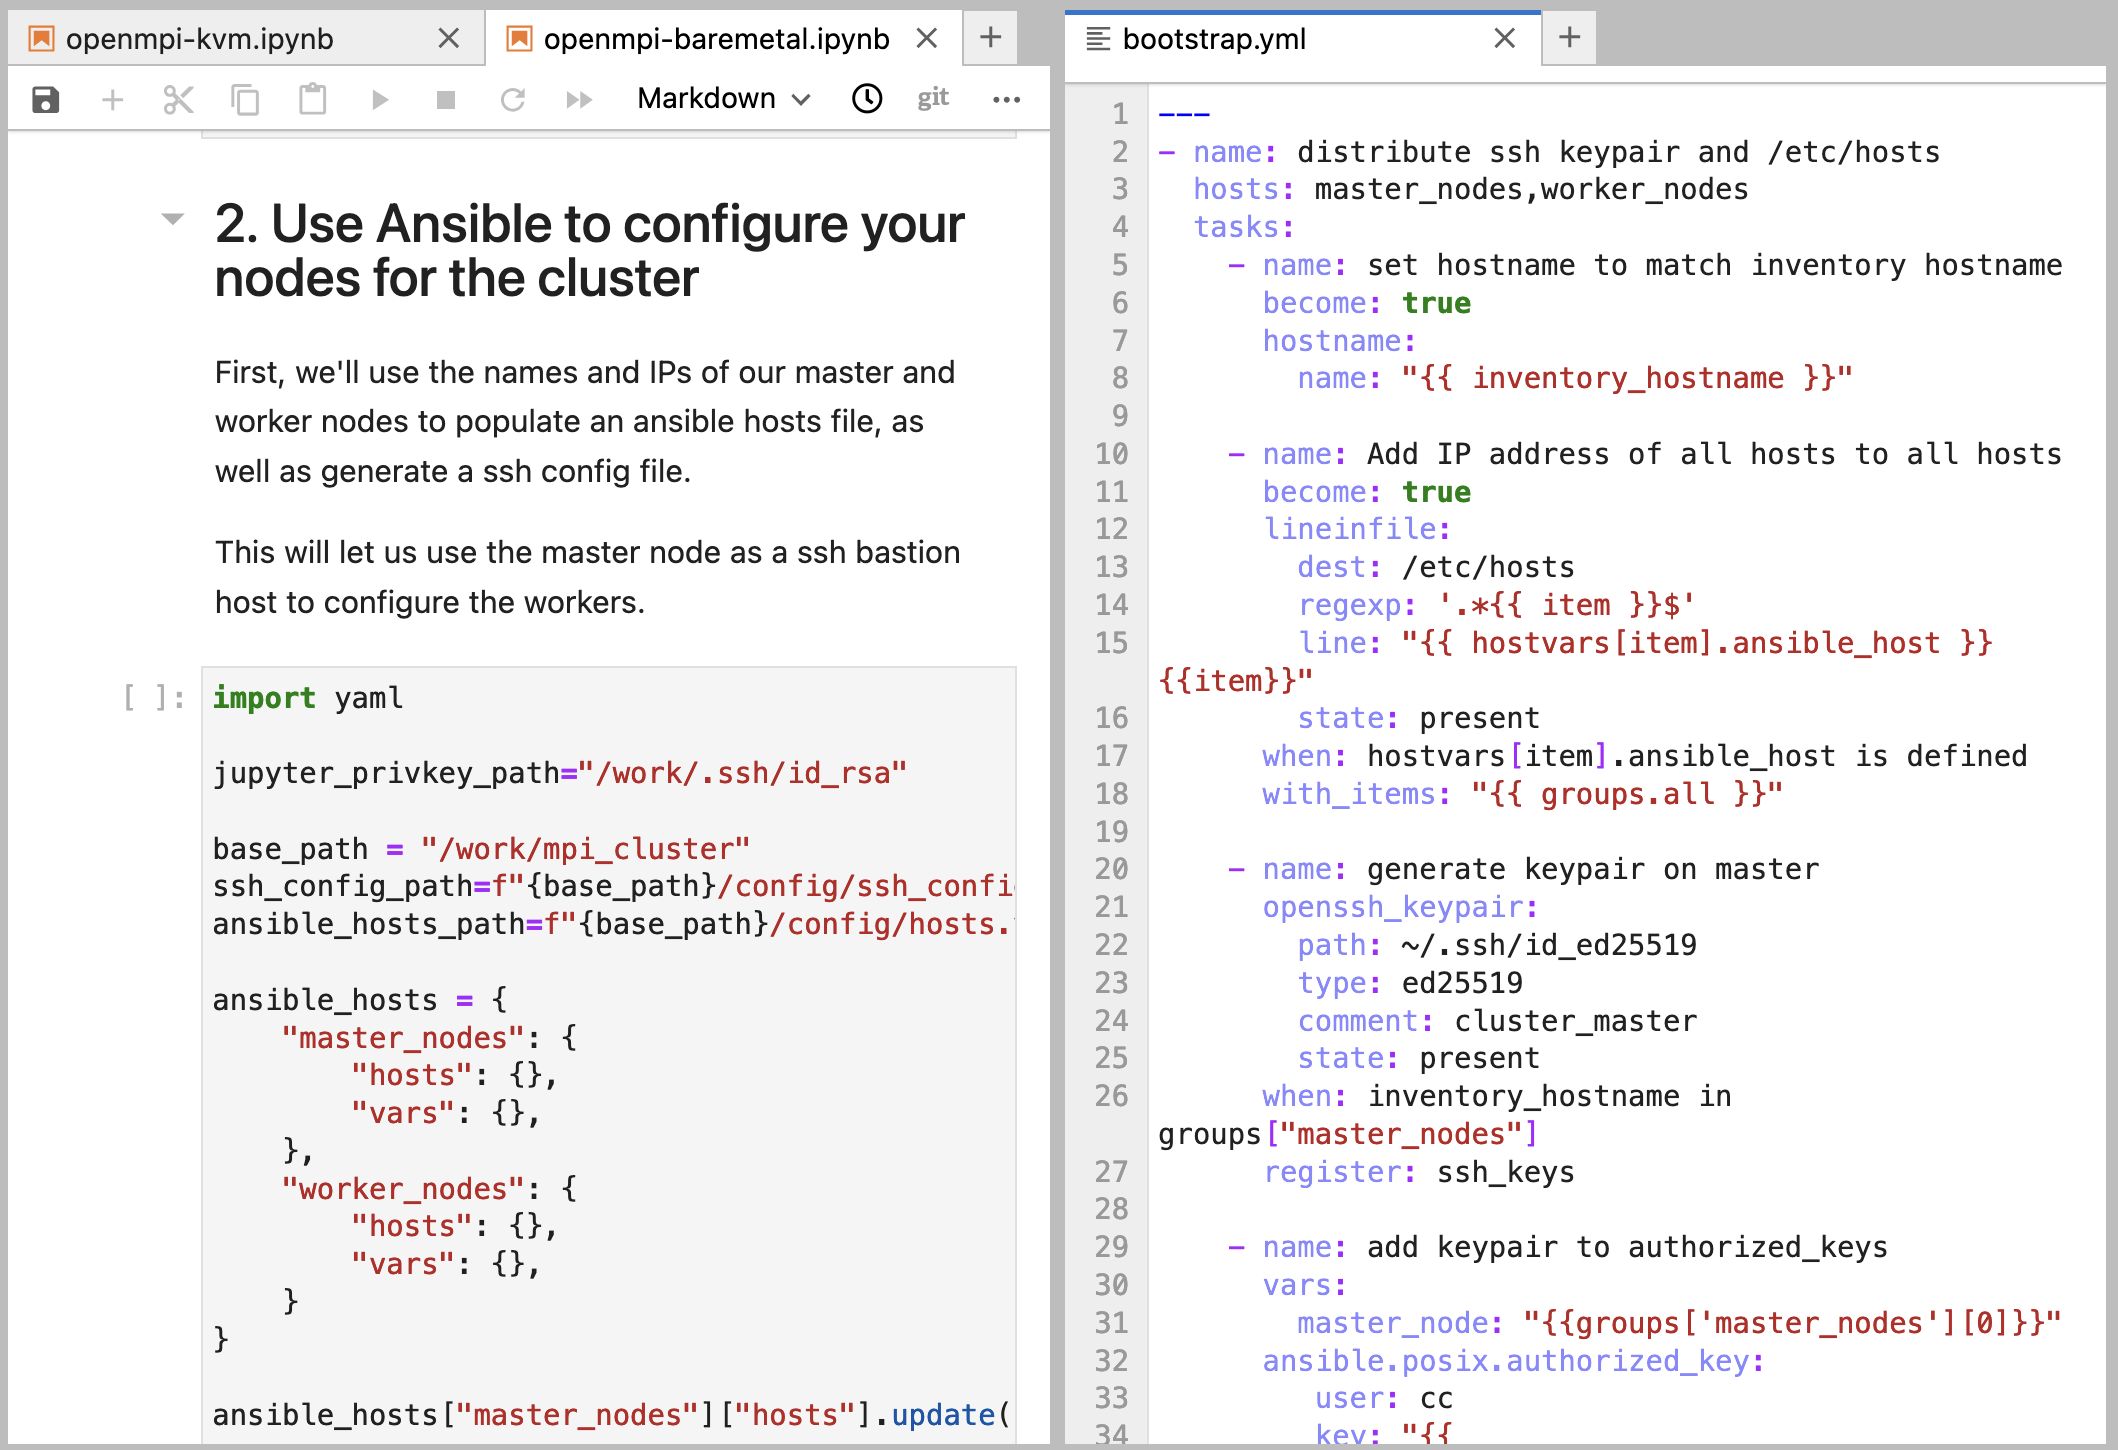
2. Comprehensive Jupyter notebooks for orchestrating the setup, with versions available for both bare metal and KVM environments. These notebooks guide you through the process step-by-step while providing the flexibility to modify parameters as needed.
3. Ansible playbooks that handle node configuration automatically, ensuring consistent setup across all cluster nodes.

How It Works
1. Infrastructure Setup
The template leverages python-chi to handle all the initial infrastructure creation:
First, it creates a reservation for compute nodes if you're using bare metal resources. Then it launches instances for both the master and worker nodes, configuring networking and security groups along the way. Finally, it sets up SSH access through the master node, which acts as a gateway to the worker nodes.
2. Cluster Configuration
Once the nodes are running, Ansible takes over to configure the software environment:
The automation configures hostnames and /etc/hosts entries to ensure nodes can communicate by name. It handles distribution of SSH keys for passwordless access between nodes - a critical requirement for MPI operations. The playbook then installs OpenMPI and related packages, and sets up the clustershell utility for simplified cluster management.
3. Application Deployment
With the infrastructure and configuration in place, the template demonstrates application deployment:
It compiles the MPI application on the master node, distributes the resulting binary to all worker nodes using clustershell, and shows how to run the application across the entire cluster using mpirun.
Tips for Success
To make the most of this template, keep these key points in mind:
When using bare metal nodes, ensure you request enough nodes in your reservation before starting - you can't add more nodes to a running cluster without reconfiguration. The master node serves as your gateway to the cluster, so keep track of its floating IP address. For initial testing and development, consider using the KVM version of the template before scaling to bare metal resources. And remember to clean up your instances when finished to free up resources for other users.
Customizing the Template
Ready to run your own MPI applications? Here's how to adapt the template:
Simply replace hello.c with your application code. If your application requires additional packages, adjust the ansible playbook accordingly. You can modify the node count and instance types based on your computational needs. For applications with special requirements, you can add custom configuration steps to the ansible playbook.
Getting Started
Getting up and running with the template is straightforward:
1. Find the "MPI Cluster" artifact in Trovi, Chameleon's sharing portal.
2. Launch it directly in Chameleon's Jupyter environment.
3. Update the project name in the notebook to match your project.
4. Follow the step-by-step execution process in the notebook.
Conclusion
This template demonstrates how Chameleon's tools can streamline the deployment of complex infrastructure. Whether you're teaching parallel computing concepts or conducting distributed systems research, having a reliable way to create MPI clusters lets you focus on what matters most - your science.
The combination of Jupyter notebooks for orchestration, Ansible for configuration, and python-chi for infrastructure management creates a powerful and flexible foundation for your distributed computing experiments. By providing this template, we hope to accelerate your research by eliminating common setup hurdles.
Packaging Your Experiments on Chameleon with Python-chi 1.0
Streamlining Chameleon Experiments with Enhanced Python Library
- Oct. 21, 2024 by
- Mark Powers
Discover the powerful updates in Python-chi 1.0, Chameleon's official Python library. This new release brings improved typing, new modules for hardware and storage management, interactive Jupyter widgets, clearer error messages, and easier low-level access. Learn how these enhancements can simplify your experiment workflow, from resource allocation to data analysis. Whether you're a seasoned Chameleon user or just getting started, Python-chi 1.0 offers tools to make your research more efficient and reproducible.
Composable Hardware on Chameleon NOW!
Introducing new GigaIO nodes with A100 GPUs
- Aug. 19, 2024 by
- Mike Sherman
Exciting news for Chameleon users! We're introducing GigaIO's composable hardware at CHI@UC and CHI@TACC. This innovative technology allows for flexible GPU configurations, supporting up to 8 GPUs per node. Learn how this new feature can enhance your research capabilities and improve hardware utilization. Discover the specifications and unique advantages of our new composable systems in this blog post.
No comments