Five Ways to Get What You Want on Chameleon
- Aug. 14, 2019 by
- Jacob Colleran
We know that most of our users like to allocate resources by simply selecting the node type that looks good – however, some of you like things to be more exact. Did you ever want to create a lease for a specific node? Did you ever want to create a lease that does NOT include a specific node? Ignore a node that has been reserved? Reserve a whole rack perhaps? Or just a few nodes but on the same rack? Then look no farther; here are five tips and tricks for node selection and node avoidance!
The key to success is to use Blazar’s resource selection; it provides a lot of options and gives you more fine grained control over which nodes you lease and their location. You can even specify the rack placement of your nodes and ensure full bandwidth between them.
While the most common way to use resource selection is to specify `node_type` under Resource Properties on the Create Lease pop-up window on the GUI, there are more options. One of the most overlooked is `uid` (the node id that you get from the lease calendar or the node catalogue). We will now go over five common reservation scenarios and show you how to get exactly what you want in each. If you have other cases, let us know via the Help Desk or leave a comment!
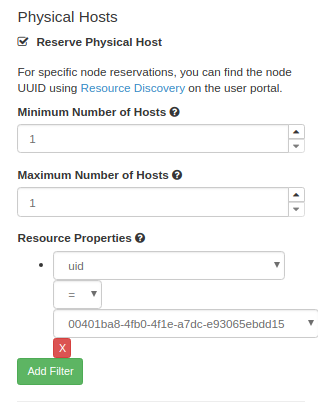
How do I allocate a specific node?
You can specify the uid of a node in the resource properties field to create a reservation for a specific node.
blazar lease-create --physical-reservation \
min=1,max=1,resource_properties='["=", "$uid","00401ba8-4fb0-4f1e-a7dc-e93065ebdd15"]' \ --start-date "2019-08-30 15:00" \
--end-date "2019-09-01 15:00" \
my-custom-lease
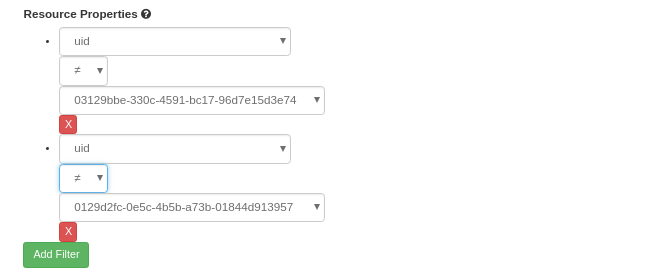
How can I avoid making a specific node part of my lease?
If there is a node (or nodes) you want to avoid, you can tell that to the reservation system like this:
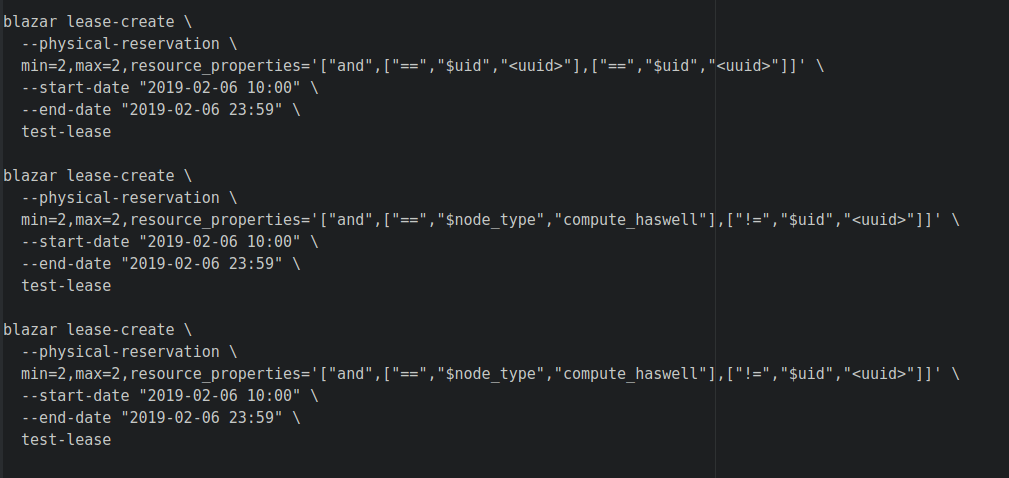
Or using the Blazar CLI:
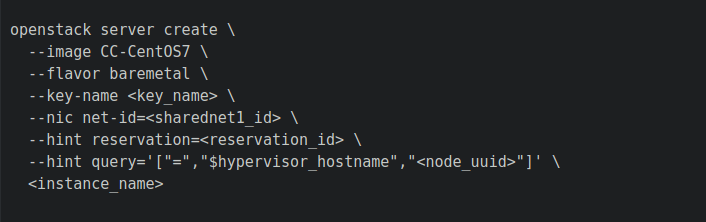
If a node is already part of my lease, can I avoid using it?
If you have already created a large reservation and you suspect one of the nodes may be bad, or don’t want to use it for any other reason, you can also use `Scheduler Hints` in Nova to arrange for this node to be dropped when launching an instance. You don’t have to create a whole new lease. Instead, use the query option as a scheduler hint when launching the instance. On the CLI, the command would look like this:
How do I allocate a whole rack?
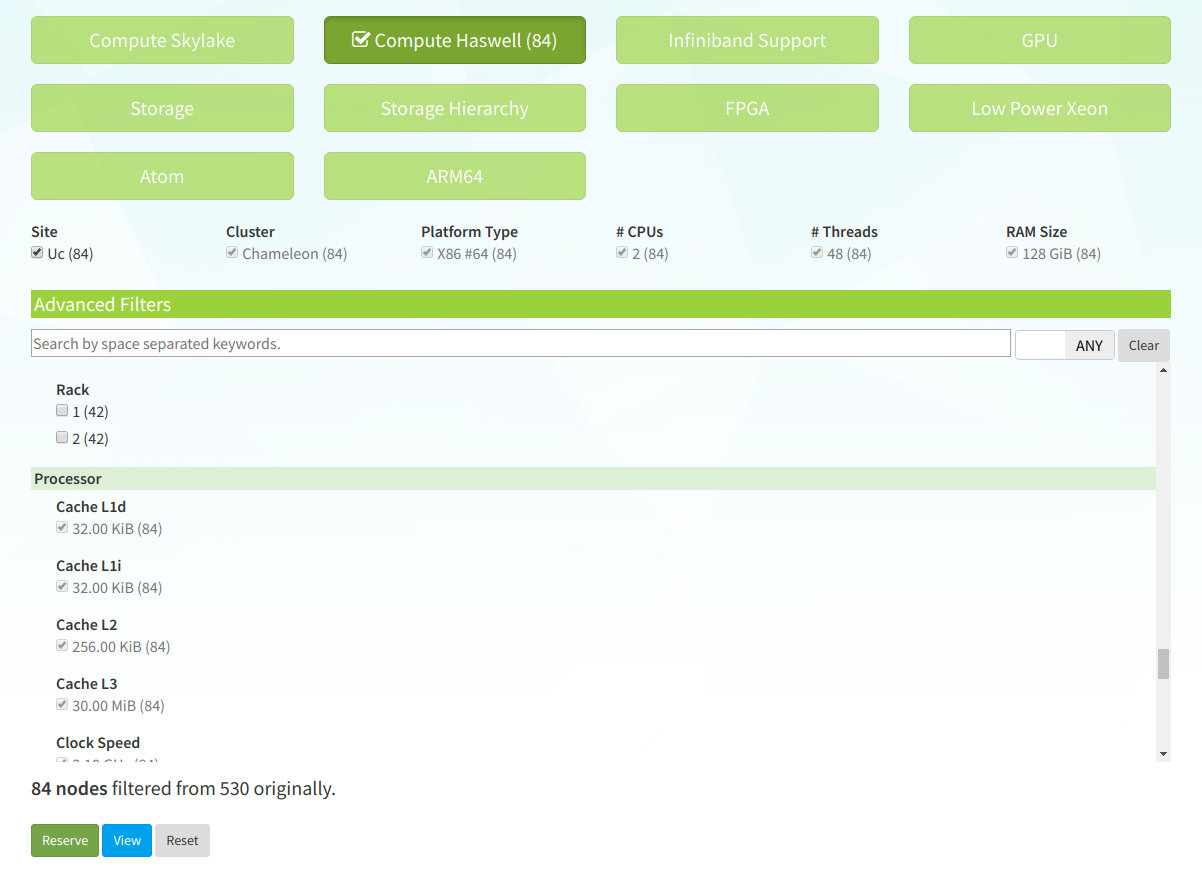
The easiest way to reserve an entire rack is to generate the command line function using Chameleon’s hardware resource discovery tool. After selecting a region (UC or TACC) use the `advanced filters` below the site selection to see fine-grained option selections. Scroll down to the option to select a specific rack and you will see something similar to this:
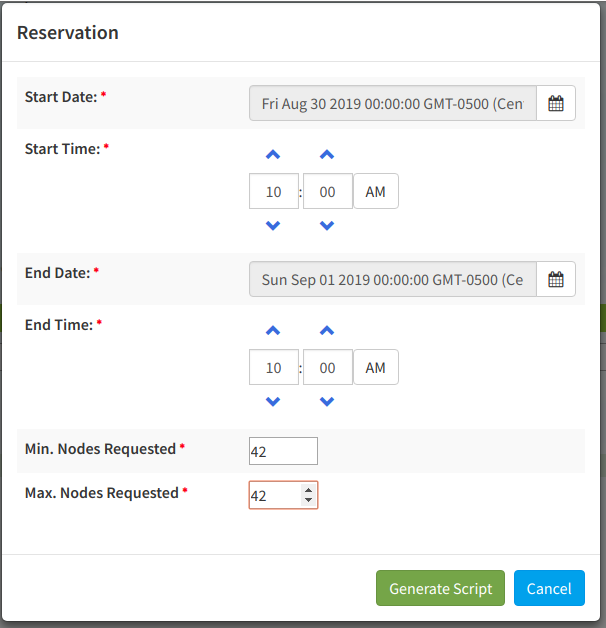
Once you click `reserve`, you will be able to input the start and end dates of your reservation and the number of nodes you require. If you want to reserve the entire rack, make sure to set the minimum and maximum amount of nodes to the number of nodes on the rack. For instance, on rack 1 there are 42 nodes (as indicated in parentheses adjacent to rack 1 in the picture above.) so you would set both the minimum and maximum nodes to 42 as the example below:
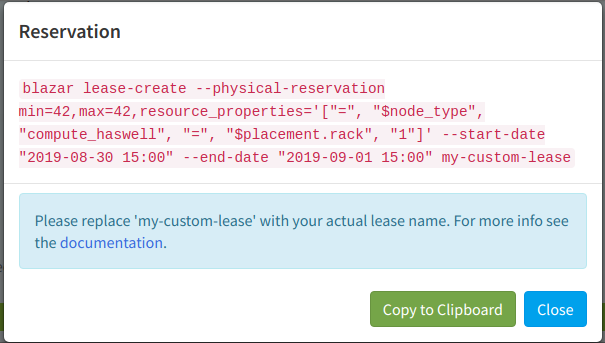
This will generate a script you can run from the command line (see below). For more information on using the CLI to reserve resources, see the documentation here.
How do I allocate 2 nodes on the same rack?
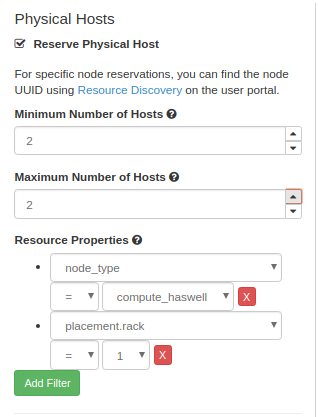
To allocate two nodes on the same rack, you can follow the same steps above for reserving a whole rack using Chameleon’s hardware discovery tool, but set the minimum and maximum node counts to just 2. However, if you already know what rack and node types you need, it may be easier to just specify the node constraints under resource properties when creating your lease in the GUI. See the example below:
No comments