Where Do I Put My Data in Chameleon?
- March 21, 2019 by
- Jacob Colleran
When working on your laptop, do you save all of your data to a thumb drive rather than the local filesystem? No, of course not, and neither do I. For one, I’m too lazy to back everything up consistently. Likewise, I trust that when I turn off my laptop and turn it back on, all my data will still be there. Our personal computers give us access to persistent data storage and that’s pretty convenient. Unfortunately, this is not the case with our instances in a cloud like Chameleon. If the instance goes away then our data is lost if we haven’t saved it elsewhere. So how should Chameleon users deal with their data?
One common thing users do is snapshot their instances towards the end of their lease with all their data on the image. This way, when you start a new lease you can load up your custom image with all your data. Kind of like what we expect when we turn our laptops back on; the data is persistent. However, as you snapshot your custom images over and over again they can become bloated. Eventually, when using your custom image, instances will have excessively long boot times or fail to boot altogether. This is because an image is essentially a bootable operating system that you can pass between different hardware in the cloud. It’s a hefty piece of software and best practices dictate that we keep our images as small as possible. In other words, this solution does not quite work which leaves us with the question: how do you store your large data sets, but have them ready to go when your instances boot?
The thumb drive of the cloud is the object store. An object store is a cloud storage service optimized to allow you to store and retrieve lots of data with a simple API. More importantly, object stores give you access to persistent data. It’s all still there after your instances are deleted! The most widely known object store is AWS’s S3. On Chameleon, we use an object store called Swift. You can interact with Swift via the GUI, the OpenStack CLI, or you can mount Swift with a FUSE module. The latter is the easiest and most intuitive to use since it allows you to access your data as if it were a local filesystem. We’ll cover how to mount and interact with Swift below. For the basics of Swift, such as creating your first container, see the Swift docs.
This is all well and good you say, but in my experiments I don’t use objects, I use files! We can remedy that: cloudfuse is a tool that will take a container from object store and make it appear as if it were a file system volume that you can mount and unmount like any other volume. So once you create a container, you can use cloudfuse to mount it, save data there as your experiment runs, unmount it after you are finished, and then mount it again to use the same data for another experiment.
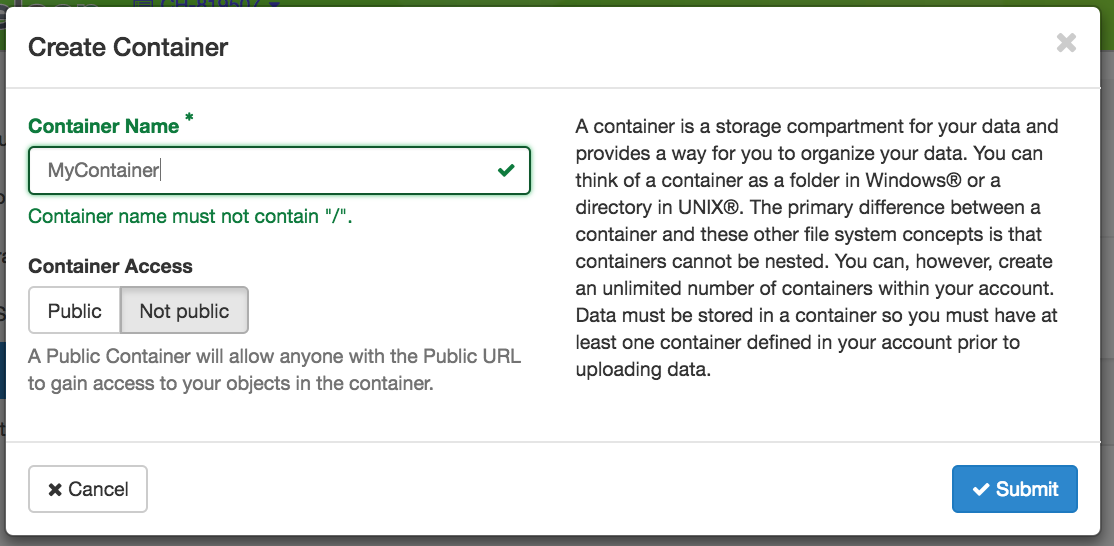
The first thing you will need to do is create a container in Swift to store your objects. Head over to the Containers section under Object Store in the GUI. Click the +Container button at the top of the screen to create your first container (see image below). Swift has a flat namespace for containers so you have to choose a unique name for your container. Most likely, <username>-container will be unused. Then simply define if your container should be public or private. You will most likely want your container to be private unless you want anyone to access your data over public internet.</username>
All chameleon base images (CC-CentOS, CC-Ubuntu16.04, etc…) come with the cloudfuse module. You can mount all your Swift containers by first creating a file called `.cloudfuse` in your home directory (e.g. /home/cc). Add the following to the cloudfuse file:
    username=<username></username>
    password=<password></password>
    tenant=Chameleon
    region=<chi@tacc chi="" or=""></chi@tacc>
    authurl=https://chi.<uc tacc="" or="">.chameleoncloud.org:5000/v2.0</uc>
Once this config file is created, you can mount Swift using the following commands:
    $ mkdir /path/to/<mount_dir> </mount_dir>
    $ cloudfuse /path/to/<mount_dir></mount_dir>
*Note: Sometimes the mount can disconnect. To re-establish connection, unmount and remount the directory:
    $ fusermount -u /path/to/<mount_dir></mount_dir>
    $ cloudfuse /path/to/<mount_dir></mount_dir>
You can now interact with the files in your Swift containers much like a local file system. You can pull data from the container or easily write checkpoint or log files from your experiments to the cloud. You can also install cloudfuse and mount Swift on your laptop so you can integrate the workflow when testing locally.
No comments